In our previous article “Post Production For Printing (And Web)” of this series, we went through the techniques involved in post-processing. Once the post-processing is complete, it’s time to prepare your photographs for the printer. Lets go through the various steps involved in printing and also how you can prepare your photographs for the final print.
-
Difference Between The Lab & Home Printers
Primarily, all commercial photo printers work on the thermal dye technology. This means that the printer’s head evaporates colors from the color band and deposits them on the paper to create prints. More deposition at one place means a darker color. Home printers are mostly inkjet printers. Due to the advent of technology it is possible to get quality prints from your inkjet printer at home which can compete with the commercial lab printers. But it is still advisable to go in for commercial prints when you want to order in bulk or want large sizes that your home printer cannot deliver.
-
Monitor Calibration
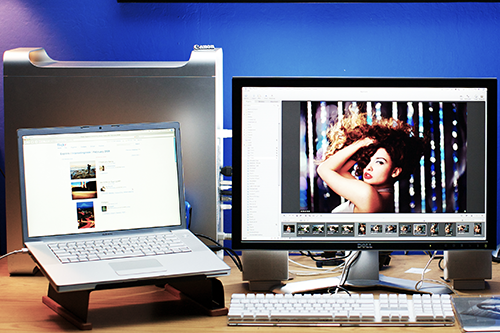
A calibrated monitor is a primary requirement of the post-processing workflow. This is especially required if you are processing the photographs for prints. This is due to the difference in display characteristics of the two media – the monitor and the paper. The monitor is an artificial source of light whereas the paper is only a reflective surface. Thus the luminance (vaguely brightness) characteristics of the monitor must be closely calibrated to simulate the paper accurately. Professional photographers use monitor calibration equipment to calibrate and profile their monitor. A good start is to set your monitor’s color temperature (white point) to 6500k (or D65).

-
Monitor resolution Vs Print resolution
The image size displayed on the monitor is not an accurate representation of the final print size that you get. This is because printers resolution is calculated in dots-per-inch whereas monitors resolution is measured in pixels. The size of the pixel varies from monitor to monitor and needs to be calculated into pixels-per-inch. In Photoshop you set the ppi in Edit > Preferences > Units & Rulers > Screen Resolution. Thereafter you can go to View > Print Size to get a pretty accurate representation of the print size. To size of the image is visible in teh info palette or by going to Edit > Image Size > Document Size. Make sure the size of prints you are ordering is close to the document size else it may be scaled or cropped in the lab.
-
Soft-Proofing
Professional photographer insist on asking the lab for their printer profile. This is important because, prints do not come out exactly as they appear on the monitor. That’s because monitors essentially use the RGB color space and the printers use the CMYK color space. Thus a mapping or transformation of image data takes place inside the printer. With the lab printers color profile, photographers are able to soft-proof their photographs (which is a very close representation of the actual print that will come from the lab).
-
Sharpening
Though we covered sharpening under post-processing in the last post, sharpening for print is different from the sharpening for web. Sharpening for print is more aggressive because the ink is absorbed by the paper. Also the ink dots projected on the paper ofter bleed into the dots nearby thereby killing the sharpness.
-
File Format
Ideally TIFF is a desirable file format as it is loss-less. However a fine JPG will do just fine and the differences are so negligible that they can’t be noticed by the bare eye.
-
RGB Or CMYK
When it’s time to send the photographs for print, it’s time to decide whether your lab requires the CMYK or the RGB images. Most of the dedicated photo printers have RGB as their working space. To be sure, check with the lab.
Printing is a complex process — one which needs to be carefully synced between various data formats, output devices and different color profiles. While this is not an exhaustive step-by-step article to walk you through the entire process, we hope is it a good pointer to get you going in the right direction. In the next and final article in this series we’ll see how to get prints at home with your very own photo printer.


“Sharpening for print is more aggressive because the ink is absorbed by the paper. Also the ink dots projected on the paper ofter bleed into the dots nearby thereby killing the sharpness”
I always thought that the bleeding (if occurring: phot-paper is coated to avoid that) affects distances compareable to the size of the ink drop, that means much below the size of a “pixel” printed at 300 dpi.
I would sharpen the picture mostly for aesthetics, not for technical issues. Lightroom for example offers some predefined sharpening presets, calculated automatically for the actual print resolution (specified in the Export window).
As written in the article, RGB is often preferred because the conversion to CMYK will be performed by the driver of the printer (unless we are talking about poster and highest-end printing where the different colors layers have to be supplied by the customer).
It’s not high-end printing, but a tip: the small machines that print on the fly photos in supermarkets and similar do not accept TIFF! always bring a JPG 100% quality with you: it’s almost lossless and always accepted.