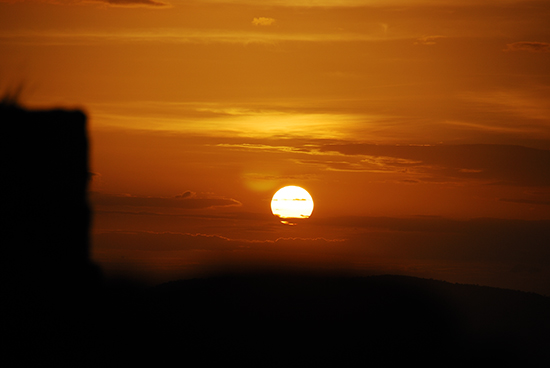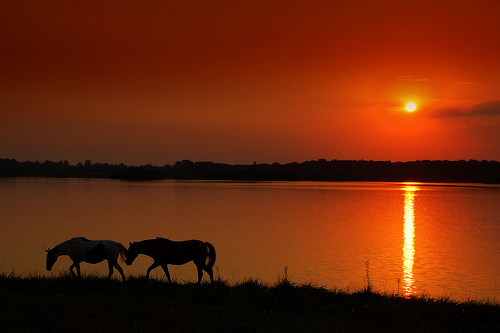
Sunset is the magical moment of the day — time to rejoice the accomplishments (of the day). Everything in the vicinity becomes serene, subtle and full of warm colors (to complement the glory of sunset). Brightness of the sky, whiteness of the clouds and the chirping birds — all fade away with the setting Sun giving way to serene beauty. And there, all the travelers, photographers and love buds coming down to the sunset points to mesmerize in the beauty of setting Sun — to view the resting Sun — across the landscapes, behind the hills… and behind the trees. Sunset is a lovely moment, and picture-perfect too. Sunset is one of the favorite subjects for all the artists and the same holds true for photographers as well. Here’s a collection of 6 photography tips to assist you in taking great photographs of the sunset:
-
Planning
On an average a sunset accounts for only 30 min of the entire day. Thus capturing it at the right moment can be tricky and requires preparation and planning skills. You have to be particular about your timing, positioning and location to take the ultimate shots. Pay attention to composition and framing ideas as it adds your unique perspective to the final result. Sometimes you may just end up by the side of the road while traveling and witness an amazing sunset. Such events are unplanned but shouldn’t take you by surprise if you are prepared and informed about the intricacies of photography.
-
Preparation (Equipment & Accessories)
Sunsets have ample natural light for a proper exposure. Thus camera shake etc. aren’t an issue. But your choice of lens will make a huge difference to the final result. A telephoto lens will allow you to zoom into the sun and get a larger-than-life sun. A wide-angle on the other hand leaves you a lot of room for cropping the composition. If you are shooting a subject in the perspective of the setting sun, you may want to bring the extreme luminance variations under control by bouncing an artificial light off a diffusing surface. This helps you from getting an underexposed subject. But in all cases try to avoid direct flash.
-
Getting The Right Exposure Is The Mantra For Great Sunset

It is tricky to capture the glory of the setting sun and the magic light. The subtle golden tones observed during the sunset can be totally ruined in an underexposed shot. The setting sun requires a slight underexposure to retain the low light ambiance in the results (else it looks an afternoon scene). This because the camera meters light differently than as perceived by the human eye. So, here’s a trick to always be perfect at your sunset shots: Meter the area directly above the sun (without sun in frame) and reduce the shutter speed by 1 f-stop so as to give an impression of delay of 1/2-hour. Follow the rule to get the appropriate exposure for a perfect sunset shot.
-
Camera Settings (And Modes) To Consider
- Bracketing: Put your camera on the bracketing mode and consider setting the number of bracketed shots to 3 (under exposed, neutral and over exposed).
- Aperture Priority Mode: Setting your camera to aperture priority mode lets you control the size of the sun. A little optometry is involved in understanding this, however the wider the aperture the larger the image of the subject. If you want to get a star-light kind of effect try setting the aperture to a small value like a f/16 or smaller.
- Shoot In RAW: Shooting sunsets is tricky at times; and you have to struggle for getting the correct amount of exposure. Shooting in RAW allows you to make large adjustments to the exposure or even recover shadow details during post-processing. It would also allow you a greater control on various parameters like white-balance, contrast, saturation etc.
-
Composition — Add Your Perspective To The Sunset
At the heart of the art is composition — it adds your unique perspective to the body of work. Composition is what makes a photograph interesting and ultimately draws the eye of the viewer. Try to remember the following and see how you can use one or more of these creatively for shooting sunset:
- Rule of Thirds: The rule of thirds is a composition rule which suggests that the subject (or any major element in a composition) be placed in the third part of the frame. This can be from the either edge of the frame. A setting sun would look more natural when placed in the lower half or the frame. Adding a foreground (birds, a tree, , rock etc) will require you to place the sunset in the first or the last third while accommodating the foreground in the scene. However if it’s not the sun which is the subject and you are shooting perhaps it’s reflection in the sea etc. give more weightage (coverage) to the subject by placing it in a larger section of the composition.
- Golden Ratio: The golden ratio is more appealing and a middle-ground between placing the subject in the center or in the third part. Placing the subject in the center tends to induce an artificial and plane feel to the scene which doesn’t always look flattering. The golden rule and the rule of thirds on the other hand more often add interest to the photograph.
- Introduce Elements In The Foreground: The sunset alone seems to be incomplete. Introducing the elements in the foreground like trees, hills, beach waters and so on adds a perspective to make your captures interesting.
- Cloudy Backdrop: Clouds add a lot of drama to the composition. However they can also ruin a perfect sunset just when you want to start shooting. Look for and capture interesting shapes embracing the sun… perhaps a small cloud with a silver or golden lining.
- Natural Framing: Put your creative and imaginative skills to action and let your captures tell a story to the viewers — add the natural frames to the setting sun. A setting sun seen from behind a tree or from the perspective of a rock is naturally more dramatic and concept centric that if shot in the plain sky. Though sometimes a minimalist approach with just the sun in the horizon would silence the critics.
- Perfect Destinations: Beaches and the sunset points (sun setting behind the mountains & hills) are considered to be the more preferred destinations for capturing the sunset. The setting sun across the calm waters and the golden sand (washed away by the tides) is arguably the best of the compositions. However there’s quite nothing like capturing the sunset from a wheat field with the perspective of the floral ornamented crop in the foreground.
- Silhouettes: Silhouettes are a very creative way to emphasize the “setting” effect of the sunset. It allows you to highlight the effect of the setting sun by hiding the details of objects in the foreground (the object appears to be the shadow; without any details).
-
Post-Processing (To Resurrect The Original Sunset View)
Post processing adds the finishing touch and just that little extra to make your results look professional. If you are a purist you may want to skip this part. However as with anything else, a perfect photograph requires a lot including a perfect post-production. This step is indispensable if you are shooting in RAW. Make adjustments to resurrect the original scene with the golden warm tones, white-balance and color casts. Try to keep the adjustments subtle and minimal to avoid giving an artificial feel to it and retain natural look and feel of the sunset.
Have a look at sunset photography examples for realistic implementation of the above shared tips and add to the collection with your stunning photographs of the sunset.


Tho me it’s always been a mystery why photographers very often show sunsets featuring a white sun. To my eyes the sun seems yellow, orange or red. I wish I knew how to avoid white suns in my sunset or sun-up shots. Any ideas, please?
Regards
Jens