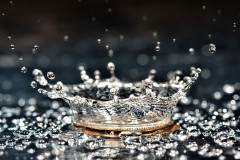
Splash photography is challenging and a lot of fun. The reason – it requires some precise coordination, the results are wonderful and you are going to have a lot of fun practicing some coordination with your assistant while witnessing some funny moments. Let’s get started with this fun e-workshop.
Items Required For Splash Photography
You need 4 white acrylic sheets each of a size of 18 inches, a tripod to mount the camera, a glass, some water or a liquid of your choice, some ice-cubes and an assistant.
Of course you need a camera too – a DSLR works the best.
Setup For Photographing The Splashes
Let’s spend some time arranging the perfect setup. We’ll arrange the 4 acrylic sheets in a cubicle fashion with only 3 sides and a floor. Use a cellophane tape to hold the sides together. Further we’ll use side-lighting in order to highlight the splash and the drops. So use two softboxes (if available) or two strong light to shine through the two opposite sides of our cubicle. Place the glass right in the center and fill it up three-quarters so that the brim is low enough for the splash to fly out into the air. Mount the camera on a tripod and place it safely at a distance of about 2 meters – that way the camera lens stays away from any liquid drops.
Time To Capture The Splash Shot
This is the fun and challenging part and needs some practice too. I remember my assistant breaking a few glasses so ask your assistant to practice dropping one ice-cube at a time right into the middle of a metal glass. Ask him to drop the ice-cube precisely as you count 3. That way you’ll make sure you get the splash when you are ready to capture it. There should be good synchronization of the action and the shutter-release.
So far so good. Time to set the camera. Frame the scene first. The action is going to be so quick that your camera won’t have the chance to focus so either set your camera to manual focus and adjust the focus for the glass or use auto-focus and lock the focus waiting to capture the shot.
Tune your camera to shutter priority mode & take test shots by adjusting the shutter speed from 1/200 sec to the fastest speed allowed by your camera. Use continuous shooting mode to ensure that you don’t miss a perfect shot.
Now that the camera is ready and you are ready too, count three and capture the shot as the ice-cube lands on the surface of the liquid creating a splash.
TIP: It’s best to avoid peeping through the viewfinder and watch the action from the camera-side with your finger firmly placed on the shutter-release button ready to shoot. This will help you anticipate the action better.
Need some inspiration! Check out brilliant examples of splash photography. Shooting the water droplets can really be fun and as you go on enjoying the unique shapes of the water splashes, take out some time to experiment with the refraction shots as well.
How do your results come out be?


Great instructions – can’t wait to try this. Congratulations on your baby – he’s adorable!
Any suggestions as to where to find the white acrylic pieces? Hardware store?
Thanks,
Tracy