 Adobe Photoshop CS6 loads several new features for photographers and graphic designers. The very first thing you’ll notice is its dark grey interface; which gives the feel of Adobe Lightroom 4.
The crop functionality has been improved to enhance the cropping speed. Now moving the crop tool while cropping, moves the background image and not the cropping frame any more.
Despite new additions, one of the major drawbacks is that, some features like Lighting Effects Filter works only if your computer supports high speed graphics.
Here are some of the newest features in Adobe Photoshop CS6 which photographers may find handy while processing the images in the digital darkroom.
Here goes the first…
1. Mini Bridge [Browse The Images With A Difference]
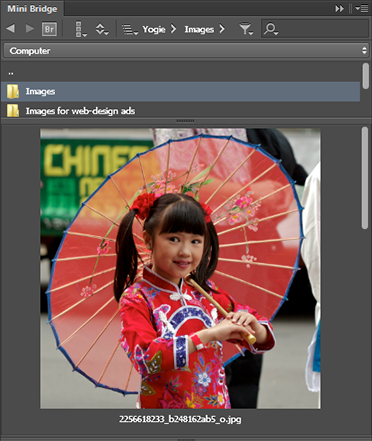
- Browse: Mini Bridge lets you browse image files on your hard drive and allows to view the responsive preview of image files under the folders.
- Sort: In Adobe Photoshop CS6, you can sort images by file-name, type, date created and modified, size, label, rating, width, height.
- Filter: You can filter images by rejected items, unrated items, star rated items, labeled and unlabeled items.
- Search: You can also search image files within Mini Bridge on your entire computer or current folder.
2. Layers [Better Layer Management]
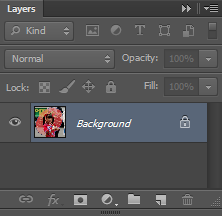
- Search: The search feature makes layer searching all the more quick and easy. You can search layers by kind, name, effect (layer style), mode, attribute & color.
- Filter: You can also apply search filters to find the layers. Adobe Photoshop CS6 enables you to filter the layers as pixel layer, adjustment layer, type layer, shape layer & smart object. You can also turn layer filtering ON/OFF.
- Lock: The layer lock now features the ability to lock transparent pixels, lock image pixels, lock position and of course lock all.
3. Color Lookup [Recolor Your Images In A Click]
Color Lookup is an interesting feature added to the Adjustments Panel in Photoshop CS6. The Color Lookup Adjustment Layer enables you to play around with different “looks” by shifting the colors. This feature remaps all the original colors of the image to the other specific colors from a lookup table or profiles. These profiles simply remap the original colors of image to other colors. You can learn more about this feature here.
4. Properties Panel — To Speed Up The Photographic Workflow
Adobe Photoshop CS6 features the properties panel which allows you to view the properties of certain types of layers. This panel presents a quick overview of the adjustments layer and the mask properties applied to a specific layers. And allows you to fine-tune the effects from the panel itself.
5. Adding Lighting Effects Can’t Get Simpler Than This
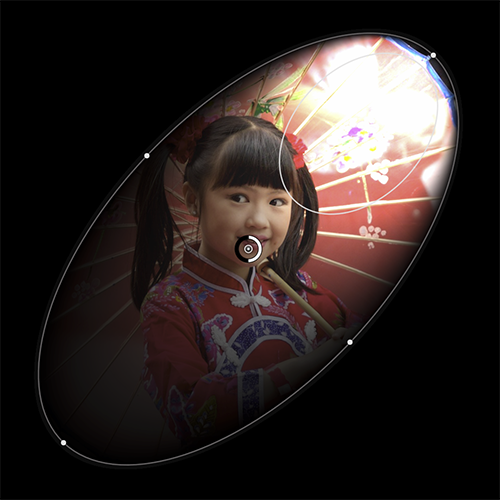
Adobe Photoshop CS6 comes with a new filter effect called the Lighting Effects. You can access it here: Filter > Render > Lighting Effects. This filter adds an oval shaped geometrical grid over the photograph which allows you to control the intensity and range of light. The central point on the grid allows you to control the intensity of the light source, the top pointer represents the light source, and left, right and bottom pointers allow you to increase or decrease the range of light. You can refer this video for giving this effect a try.
6. Blur — Get More Creative With Blur Effects
There are three types of the blur effects that have been introduced in CS6 — Field Blur, Iris Blur and Tilt-Shift Blur.
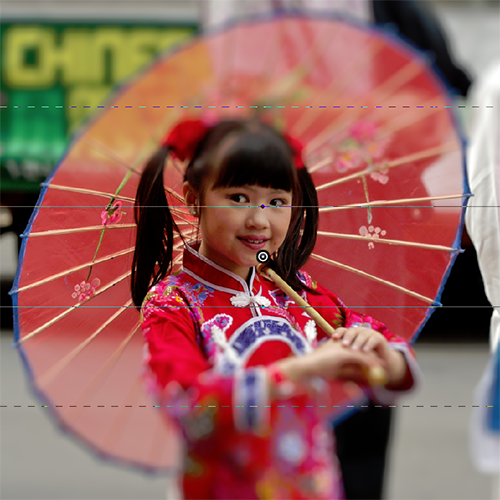
- Field Blur: Field blur allows you to blur the image around any random point you select. You can increase and reduce the intensity of the blur. You can place as many points as you want on your image to blur different areas of the image with different values.

- Iris Blur: Keeping the center of the image sharp, you can blur the rest of the image in the circular fashion by employing Iris Blur.

- Tilt-Shift Blur: You can get creative with your images by applying the tilt shift blur. When you select Filter > Blur > Titl-Shift Blur, it places a rotatable horizontal grid on the photograph. The part of the image featuring in the middle grid remains sharp while the portion of the image on other planes is blurred to replicate the tilt-shift effect. This effect comes out nicely on landscape photographs.
7. Liquify [Creative After-Effect]
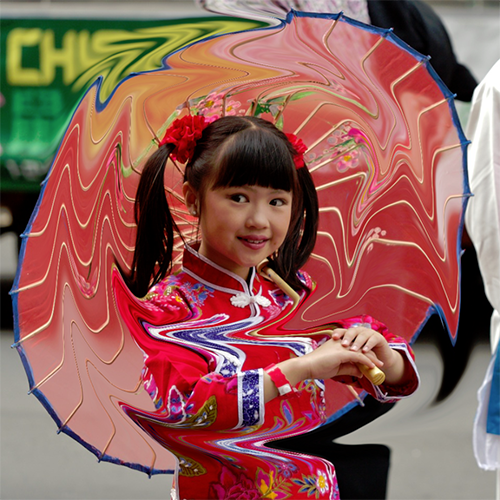
The Filter menu has yet another interesting tool to get your creativity rolling in. The Liquify tool as the name suggests allows you to replicate the effect of spilled water or a view through the water as in the image given below.
8. Content Aware Move Tool
Content aware fill in CS5 comes in quite handy to remove distracting elements off the composition and Photoshop CS6’s content aware move tool takes this functionality a step further. Now you can move and replace the elements to a better position in the photograph. Watch this tool in action here.
Which one is your favorite feature?

