 Macro photography is an amazing opportunity to enter the world of beautiful surprises. Minute details, fine textures and life size reproduction are enough to get you excited. However investing in a macro lens is not always a feasible option, that too, just for experiencing the fun of capturing the macro details.
If you’re immensely interested in trying out your hands at macro photography, reverse lens technique is one of the affordable ways at your disposal. Using a close-up filter on the lens barrel or attaching extension tubes and bellows are also good options to consider, but using a reverse macro ring / adapter or a coupler ring is far more inexpensive. Reverse lenses actually offer a powerful way of shooting macros with more than life size reproduction.

A true macro lens allows you to fill the frame with 1:2 or 1:1 reproduction, that is either half the size of the small subject or equivalent to the life size of the macro subject. The reverse lens technique on the other hand allows you to get extremely close to the subject to achieve up to 3x life size projection. Let’s see why does this happen.
When you reverse the lens you essentially try to reverse the way the lens projects an image to the camera sensor. There is a little bit of optics to it. Normally a lens looks at a wider field of view and focuses it on a much smaller plane, i.e., the camera sensor. Thus the lens looks at the bigger picture and forms a small image on the sensor.
On reversing the lens, the lens turns up the theory of “big to small” to “small to big”. The reversed lens will focus on the narrow plane to form a bigger picture.
Reverse Lens Technique — The Technicalities
Reverse lens technique is simply about mounting a reversed lens to your camera, that is, attaching the camera lens in such a way that the rear element points outwards and front element (lens barrel) mounts on the camera.
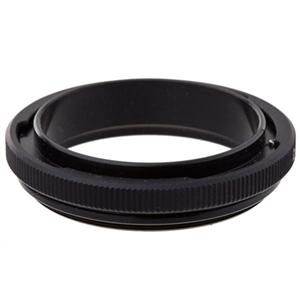
This can be done by using a lens reversing ring, one side of which mounts to the camera and the other holds the reversed lens in place. You can buy one from Amazon or Adorama for as low as $9.95.
When you reverse the camera lens, you however loose the camera’s ability to communicate with the lens. This means no auto focus and no control over lens aperture. To control the aperture, you will thus need a lens with manual aperture ring. Any Nikkor D-series lens or Canon FD lenses for instance will do. If your lens doesn’t have a manual aperture ring, you will not be able to stop down the light and thus will have to work with maximum aperture. Nevertheless, you can still give it a try for some beautiful abstractions.
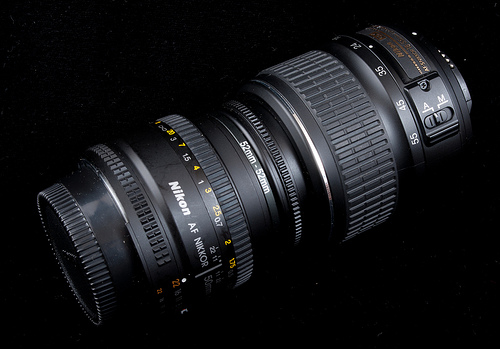
You can also achieve the reverse lens set up by stacking a secondary lens over the primary lens. For instance placing a reversed 50mm prime lens over your 18-55mm kit lens. All you need is two lenses and a lens coupling ring.
The advantage of using this technique is that you no longer need to look for a lens with the manual aperture ring. You can leave the reversed lens open at the widest aperture and stop down the primary lens for increasing the depth of field.
How To Shoot With A Reverse Lens
Reversed lens technique is a specialized set-up. You cannot simply point at the subject and shoot it as you normally do. The reversed lens has its own caveats. Check out the following tips to work out with reverse lens.
-
Attach The Reverse Lens
If you have two lenses go in for lens stacking and if you have one you can attach a reverse lens by using a reverse lens adapter as discussed above. You can use a fast prime lens or zoom lens or both. With zoom lens however keep one thing in mind. When you reverse a zoom lens, it’s zooming mechanism will also reverse. That is you will have to zoom out to actually zoom in with the reverse lens.
-
Image Stabilization
The slightest of hand blur or camera shake at such magnification can completely ruin the photograph. However, if your camera has IS feature need not worry, else rest the camera on a sturdy surface or mount it on the tripod. If your camera provides mirror lock up, turn it on. This will also help in minimizing the motion blur.
-
Turn On The Manual Focus
Auto focusing is no help here. You will have to turn on the manual focus. You will have to set the focus by physically moving the camera closer to the subject. You will have to work in the range of 1 inch or so. If possible move the subject closer to the camera as struggling with tripod is not a feasible option.

-
Play Around With Aperture Settings
The camera with reverse lens looses all the automatic features. Therefore, turn on the manual mode. DOF is extremely shallow at close proximity and you will have to stop down the aperture for better focus. Set the aperture to f/8 and experiment by stopping the light by varying the aperture, shutter speed and zoom levels. The viewfinder will blacken out as soon as you adjust the aperture ring manually and as such hitting the sweet spot requires a trial and error approach.
Take multiple shots of the same scene and later stack the images in Photoshop for a sharper focus.
-
Lighting
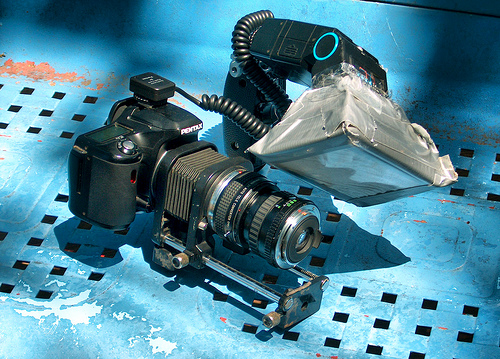
At such a close proximity, getting proper exposure is a challenge. Sometimes you will end up casting shadow of your lens and other times there will be too less light entering the camera owing to narrow aperture. So try to illuminate the subject with natural light, artificial light or even an external flash will do. You can get some great macro photographs in a small studio set up.
-
Protect The Lens
The reversed lens potentially exposes the pins transmitting the electronic signals and the internal glass element of the lens to dust. This can greatly damage the lens quality. Therefore, you need to be extra careful with your lens in this kind of set-up. Keep the lens protector cap handy and place it on when not shooting.
Rest you will learn by trying it out. So get ready to have fun with extreme close ups. Ans don’t forget to share your pics!


Nice article…
While reversing, what mm do you suggest for the secondary lens, wide-normal-tele?