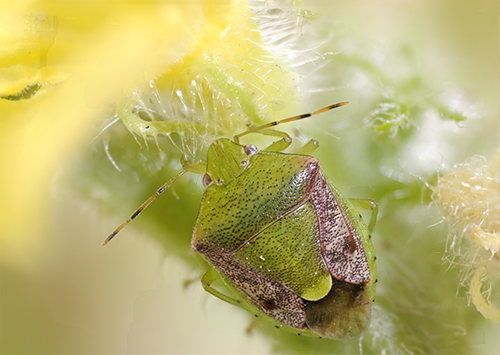
Macro photography is a world of fascinations. The fine details and unexplored world of macros make it all the more refreshing each time you take a look at some of the perfectly finished macro photographs. Ecstaticist’s photostream, Lord V’s photographs and Macorlin’s shots find a special mention in this respect. Shallow depth of field, sharply focused details and amazing macro shots is what makes the difference. Beautiful shots of water droplets, specially morning dew refraction shots are enough to take you by surprise. For instance the image to the right (shot by Ecstaticist) is an inspiration for trying out unique composition.
The collection named A Thousand Drops Of Light, showcases Ecstaticist’s passion for photographing the water droplets with simply amazing shots like this one. While Ecstaticist completely relies on in-camera setting to get such lovely shots, you can try out something like this by employing the technique called Focus Stacking.
What Is Focus Stacking?
Focus stacking as the name suggests is the imaging technique wherein a set of images shot at different focus distance are stacked onto one another to result in sharp focused image. In other words, focus stacking is an image processing technique used for increasing the depth of field in a macro shot.
Focus stacking basically finds its application in macro photography, where getting sufficient depth of field becomes a challenge owing to the following facts:
- Distance To The Subject: The lesser the difference between the subject and the camera, shallower the DOF is. This is what happens when you use the macro lens — you get closer to the subject and thus the background (and foreground) is blurred. This can often result in blurring everything else than the focus point, for instance, the outer pollen grains in case of this photograph.
- The Aperture: When you tune in the macro mode on your camera, it automatically sets the larger aperture to easily take the close up shots. This reduces the depth of field considerably, thus blurring the out-of-focus subject.
As an inference, the camera settings for macro photography makes it difficult to get high DOF. Focus stacking thus enables you to get the entire subject in sharp focus while leaving the background soft and smoothly blurred.
How To Shoot Your Stack Of Images For Focus Stacking
Put on the macro lens, tune the camera settings for macro photography and set the camera on the sturdy surface or the tripod. Now all you need is to take the macro shots of the subject, by varying the focus points though. Take the multiple shots of the same subject with same setting and from the same point of view but by changing the focus point each time. You can change the field of view either by rotating the focal ring or by moving the camera. While doing so, make sure that the current focus point overlaps the in-focus part of the previous image. This helps in getting accurate results upon automation.
Focus Stacking In Photoshop CS5
Transfer your images to the computer and open them with Photoshop to let the magic happen. If you don’t already have the stack of images, you can download the files from here to see how image stacking works in Photoshop. Here are the steps for stacking the images in Photoshop.
- Open Photoshop and go to File > Automate > Photomerge.
- Load the source files by browsing the files on your system and select Auto from the Layout pane. This will auto-align the images for you. Make sure that all the checkboxes in the Source Files section are unchecked.
- This will load the individual images as layers in the Layers pallete.
- Select all the layers (CTRL + click each layer or select the first layer and hold Shift and select last layer). Go to Edit > Auto Blend Layers. Choose Stack Images, select Seamless Tones and Colors and click OK.

Auto Blend Layers
- This will blend the selected layers and result in a seamless composition with overall sharp focus, except for some roughness towards the edges. Crop the edges to arrive at the final image. Check out the final image. It’s sharp, crisp and has increased depth of field.

Final Image: Sharp Focus, Increased DOF
You can also use CombineZP for applying this tecnhnique, however the process may change. CombineZP is the free alternative to Photoshop and you can get it here to try your hands at focus stacking just in case you don’t have Photoshop.
And now it’s time to get set go for focus stacking!


Is it better to move the camera to the new focus plane or keep the camera stationary and refocus?
Movement will change the composition of the photo and if you are shooting the insect then it may get distracted too.