
Flashback: It was 2011. I had been away from Nikonland for over twenty-three years! Circumstances had compelled me to part company with my beloved Nikon FE, with its exquisite MD-12 motor drive.
In a fit of masochism not entirely unknown to camera enthusiasts, along with the camera body and drive motor, I also disposed of my lenses — an act of folly I was to bitterly regret later. So off went my trusty 50mm f.1.4, the legendary 105mm f.2.5, the indispensable 80-200 f.4.5 zoom-Nikkor and the razor sharp 55mm f.3.5 micro-Nikkor.
Fast forward to November 2011. I stood outside a Nikon retail outlet with Rs 40,000 in my pocket. It was time to return to Nikonmania, and the wad of currency notes was my visa. I took a deep breath and strode in …
Exhaustive reading had forewarned me that the old regime was gone; a whole new digital world had replaced it. Gone for the most part were the tank-like metal bodies, the near-indestructible lenses, the infallible weather-proofing, the sheer delight of manual shooting (though the FE did have an excellent ‘Auto’ function) and viewfinder focusing aids that made pinpoint focusing a cakewalk. I wasn’t expecting much from the new fangled technology, the plastic bodies, the relatively flimsy plastic-bodied lenses, some of which even had – horror of horrors – plastic mounts!
But a Nikon I’d set out to buy and a Nikon DSLR I had bought out of loyalty to a brand that had served me well in the past was a slightly different experience. Never mind that a small voice at the back of my head kept telling me it wasn’t going to be the same experience as the FE and that I’d better be prepared to cut the D5100 a little slack.
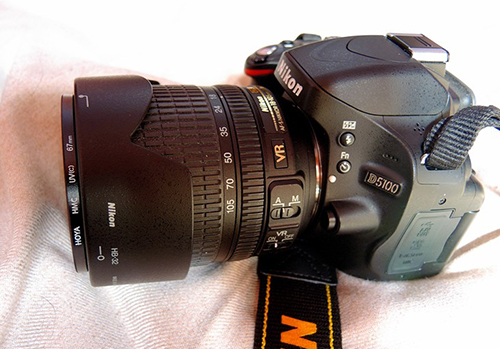
The small voice was right. It was a different experience. The plastic camera body may have been predominant, but it didn’t feel at all flimsy and the images coming up on my screen and, later, on my monitor, blew me out of my socks. I tried to control my mounting excitement as I put the Nikon D5100 through its paces. Harsh sunlight, low light, subdued room lighting (remember, I only had the ‘humble’ 18-55mm f.3.5~5.6 kit lens…but more on that later), mixed lighting — the D5100 took it all in its stride. I was intrigued: it was time for a closer look …
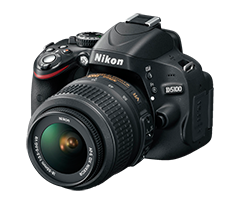
Nikon D5100 — Body & Design
Pick it up and the camera seems to mould itself to your hands. Anyone who’s into handguns knows the feeling of completeness when holding the pistol of one’s choice. Fingers seem to curl around the butt just right, the index finger seems to find the trigger the way an F-16 slides onto the carrier deck in heaving seas.
In short, it fits like a glove. My first “WOW” moment came when I first held a Walther PPK 7.62mm. It didn’t come again till the FE with its solid MD-12 motor drive came into my hands. Would the D5100 be a repeat act?
The short answer is: not quite.
The D5100 is one seriously small camera, not much bigger than its baby brother, Nikon D3100 (which we shall cover in a later article).
True, it fit well enough to suggest that the designers had taken a clay mould of my hand before designing the grip, but it was so small that my pinky found itself curling around under the base. That wasn’t all bad, because it offered some support from underneath.
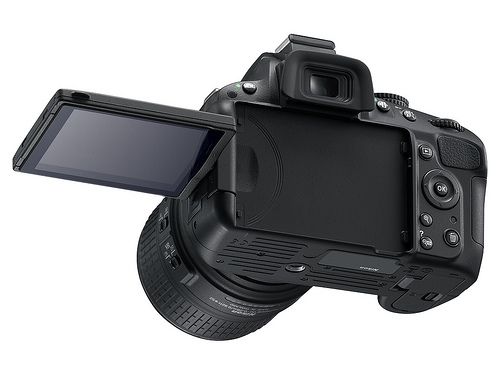
My index finger came to rest naturally on the shiny shutter button, with enough leeway to access the on-off switch, the (red) movie recording button, the info button or the +/- exposure compensation button without having to stretch. There was a ridge on the grip that gave a snug fit to the fingers, and the thumb came to rest on a rubberized, tilted ramp that increased the feeling of stability. At 4 frames per second, the drive beat my MD-12 motor drive by half a frame a second. And 16.2 megapixels is no laughing matter when it comes from Nikon, I reminded myself. The flip — our 921K LCD screen was a delight.
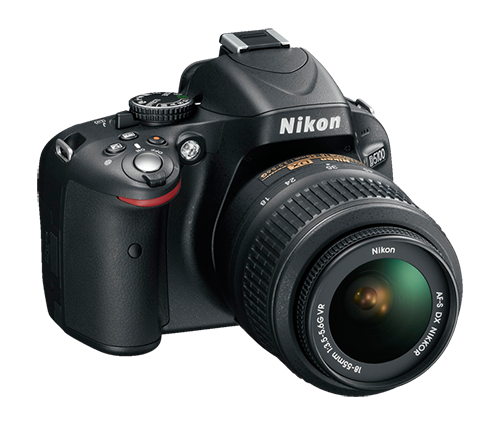
Before I talk any more about the body and controls, let us first take a visual tour of the camera:
The Top Deck Of D5100: Looking down at the camera, one sees nothing on the left of the LCD, but towards the right there is a mode dial, co-axial to which is a live view lever. The mode dial has markings / detents for Manual (M), Shutter Priority (S), Aperture Priority (A) and Program (P). The last three are all variants of ‘auto’ mode. There are other modes, too, which we’ll discuss later.
Let’s see how all these different modes work, in practice:
Manual (M): In the Manual mode, rotating the knurled command dial changes the shutter speed. Turning it while holding down the +/- exposure control button enables one to change the aperture. A horizontal metering bar appears at the bottom of the LCD screen or viewfinder. The center pip is the null point, with under – or over-exposure represented by more pips to left or right.
An exposure meter is an instrument that reduces all that it sees to the tones / values of an 18% grey card reading. Go solely by it without using your own estimates of the correct light values of a scene as determined by you, and you can find that you metered wrongly. Go by your hunch / estimate of the exposure and adjust the meter suitably, in manual. A little experience, or a few test exposures, will help you get the exposure you want.
One of the BIG advantages of metering manually is that if you are keen to photograph only one scene in lighting of fixed intensity, once you’ve got the exposure right, you don’t need to adjust it again.
But if light levels are fluctuating, it’s usually best to take the automatic route (remembering to dial in the degree of exposure compensation that yields the kind of exposure values you prefer, i.e., bright or slightly darker. The D5100 lets you do all this in less time than it takes to describe.
The matrix meter on the D5100, in true Nikon fashion, generally gives very accurate exposures and is not easily fooled. The other options, to be used when warranted, are the usual suspects of center-weighted and spot metering. I always categorize a scene I’m about to shoot in terms of general, condensed and highly concentrated. That is, whether my main subject is the scene as a whole, a central portion thereof, or just a tiny fraction of it, say about 2 or 3%. This makes it easy for me to set the metering pattern when I want my exposures to be spot-on.
Shutter Priority (S): This setting allows you to fix the shutter speed, leaving it to the camera to adjust the aperture. This setting is usually the best for action shots or low light, where a certain minimum shutter speed is advisable. The camera will perform within the minimum / maximum limits set by you. Check out more about beautiful effects induced by shutter speed here.
Aperture Priority (A): This setting allows you to set the aperture, with the camera adjusting the shutter speed seamlessly. This is best for landscape, interior or portrait photographers, who normally need control over depth-of-field for every shot. Learn more about aperture settings here.
The third parameter of exposure – the ISO speed – is discussed elsewhere. Taken together, shutter speed, aperture and ISO settings determine the overall exposure. Refer this article for the pillars of exposure. If this concept is not clear, a little experimentation with the D5100 using different settings will reveal the best combinations depending on various situations / your personal requirements / preferences.
Which ISO Setting To Use: This is a vital question and beyond the scope of this piece. Future articles will explore all the three settings and their ramifications individually and in greater detail. Suffice it to say that if you have the luxury of sufficient light and a slow or stationary subject, choose the lowest possible ISO, for maximum image quality.
If the light is poor, there is significant subject movement or you have a slow lens, it’s better to bump up the ISO. The D5100 can give amazing results even at ISO 2000 or beyond. Many people even set it to Auto ISO and forget that part of the equation, the 16.2 MP sensor on the D5100 (which it shares with the prosumer model, the D7000) is that good.
Program (P): In this mode, the camera offers a certain combination of shutter speed and aperture. Nikon calls it “flexible program”, meaning that, unlike the Auto mode, you can change this combination depending on your intentions. Increasing the aperture (wider lens opening) will give a narrower depth of field; increasing the shutter speed will let you freeze movement. Turning the command dial in either direction gives you different combinations of settings, all of which result in correct exposure. I’ve italicized ‘correct exposure’ because the aperture or shutter speed may not be appropriate for the depth of field (or lack of it) or control over subject movement which you actually want.
Auto (A): After the ‘P’ setting, we come to the Auto setting. This can bamboozle you into handing over complete control to the camera, especially if Auto ISO has been set in the menu. Not for nothing does Nikon classify the D5100 as an entry level camera. But don’t let that nomenclature upset you: it is just a marketing decision to widen the target audience. The Auto feature can give excellent results for ordinary, everyday subjects that do not need any special attention being paid to either depth of field or shutter speed, or when you have to shoot fast and hope for the best. However, I would always prefer to use the P mode, because I can adjust the shutter speed / aperture combination in the instant it takes to twirl the command dial with my thumb.
To be continued in Part II of this review. [Check out Part II of this review here.]
