Panoramic photography is the technique of creating images with elongated field of view. Mostly popular among landscape photographers, this technique enables the photographers to merge multiple images to form a true panoramic image — an image with wide aspect ratio (ranging from 2:1 to as wide as 10:1) along with a wider field of view covering upto 360 degrees. Panoramic photography opens creative possibilities for the photographers to capture extremely wide landscape scenes.
The popularity of creating panoramas traces back to the days of film, when the photographers had to blend the printed versions. With photography and photo-stitching process going digital, it is now fairly simple to create panoramas. It simply requires you to shoot a series of overlapping images which are then uploaded to the photo-stitcher for creating the panoramic image automatically. While digital age has made it easy to create panoramas, you have to take care of certain aspects like consistent viewpoint, camera alignment and so on to turn the images into stunning panoramas. Here are 7 incredible tips to help you create breathtaking panoramas.
-
Keep The Camera Level
Panoramic masterpieces result from the images shot with a consistent viewpoint. Varying the angle of camera in-between the shots shows up adamantly in the final result. While the image with a varied angle of view may be a good contender as single image, it pops out oddly to exaggerate the distortions when blended to form a panoramic image. It is therefore advisable to set the camera on the tripod and pan it from left to right or top to bottom. This helps in maintaining the alignment and viewpoint of the camera.
-
Set The Exposure Manually
The next important thing to consider when shooting the images for creating panoramic images is to maintain the same exposure across the images. The camera being an intelligent machine meters the scene and accordingly varies the exposure as required by the scene. When you pan the camera from left to right, there are chances that the exposure for each shot may vary. When the multiple images with varied exposure are merged together it results in the banding effect. It is therefore better to set the exposure manually and minimize the possibilities of ruining the photograph at bay.

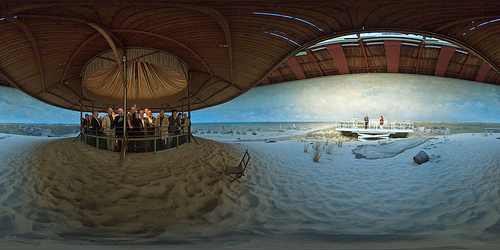
On The Dune Of The Panorama Mesdag
-
One Focal Length
If using a zoom lens for creating source images, consider not to zoom in or out of the scene. Using consistent focal length while panning the camera from left to right (or top to bottom) helps in maintaining the steady viewpoint across the images. This helps in perfectly aligning the overlapping images. Also going too wide (zooming out) does good in introducing unwanted distortions which makes it difficult for the stitching software to align the images seamlessly.
-
Overlap Sufficiently
Overlapping the images properly is one of the basic requirements for creating panoramic images. To create stunning panoramas, consider overlapping the images by 20%-30% or more. The lesser overlap introduces the artifacts when the stitching software tries to automatically align the images to assemble the panorama.

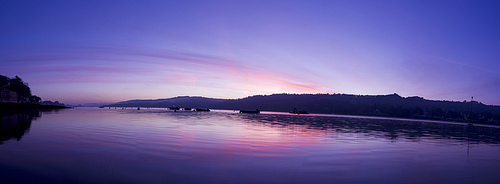
Panorama Sur La Riviere
-
Manual Focus Is A Good Consideration
When shooting the source images for creating panoramas, it is a good consideration to turn on the manual focus. This ensures that the main focus points of the frame are aligned to the center of the image while making sufficient room for overlap along the left and right sides of the frame.
-
Go Vertical

Vertical Panorama
Panoramic photography is best considered for creating wide angle images of beautiful landscape scenery. The expansive stretch covered by panoramas give an opportunity to beautifully and creatively portray dynamicity of nature. While creating horizontal panoramas (covering the wider aspect of the scene) are quite common, trying your hands at vertical panoramas is a good option for experimenting with something new. Just rotate your camera, find the vertical scenes (like huge pillars, skyscrapers and waterfalls) and start taking the overlapping shots vertically.
-
Stitch your photographs (in Photoshop)
Last but not the least, it’s time to experience the ease of stitching the photographs in Photoshop. Photoshop offers a feature called Photomerge which combines several photographs to form a panoramic image. Photomerge assembles the images to present them as a single image with an elongated field of view. Here are 3 simple steps to merge the photographs into a wide angle view panoramic image.
- Go to File > Automate > Photomerge.
- Select the files or the folder from the Source Files panel and choose — Reposition from the Layout panel for seamless panoramic image, spherical for 360° panorama or other layouts for creative juxtaposed results.
- Select Blend Images Together and push OK. Wait for Photoshop to create a multilayer image from multiple source images. Crop the image to remove empty pixels.
How do you create beautiful panoramas? Feel free to share your tips.


I shoot panos with an 18mm lens and then crop in photoshop. Now you have to have the right subjects for this but it works pretty well. There are some of these on my website, check it out!