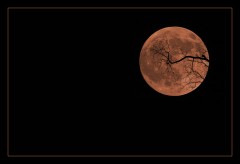
Nature is beautiful and the silent companion of nature at night — the moon, adds to its beauty and elegance. It thus becomes an attractive subject for photographing at night. The captures of this celestial body makes everyone charged with the sense of contrasting beauty and wondrous thoughts. Even though it is one of the trickiest objects to photograph (owing to infinite distance), an amateur and a pro photographer love to click it onto their camera frames equally. The magic of the silent beauty and calmness of its character swipe everyone to the world of imaginations. Everyone loves to capture this silent beauty, but it requires a little effort to make the photographs narrate the beauty aptly. Here are some tips which will guide you to take great photographs of night moon and will enable you to make a mark with your photographs:
-
Planning And Observing:
Capturing spectacular shots of this celestial body requires a lot of pre-planning. The night surfer moves along the sky over the night and thus, gives a lot of opportunities at varying time frames. Sometimes it is filled with brightness and at other times it reflects a glimpse of dullness and yet at some other times it might struggle to peep out of a wrap of clouds. Also, it undergoes various phases in the span of time. In its journey from day to night and night to night it follows some specific path and pattern to move around. Just become a silent admirer and observe it as it travels day by day. Once you know your subject well, it becomes relatively easy to capture them onto your photographic frame.
-
Composition:
The Moon by itself against the sky forms an elegant and mesmerizing scene. But then you need to be aware of its placement on the canvas. Apply rule of thirds or golden ratio to take a justifiable shot, avoid framing it in the center. Consider foregrounds, or landscapes or hint of some other natural elements, to add a perspective to your composition. Shoot through the window-frame of your room if you like.
-
Tune The Camera:
The basic necessity for photography is to train yourself on your equipment and understand your camera well. And all you need to do then is to tweak certain camera settings. Consider the following settings before going out on a wild gaze:
- Aperture Priority Mode: Set your camera to Aperture priority mode so as to attain the widest aperture to compensate for lack/scarcity of light at night. Thus, set it to minimum f-stop value that your camera offers.
- Low ISO: Maintain your ISO in the range of 100-400. The low range of ISO helps capturing details while avoiding noise at the same time.
- Spot Metering: The scene at night with bright moon as the subject in the dark sky may make it tricky for the camera to meter appropriately. The moon thus may be overexposed as the camera tries to increase exposure to compensate for the dark element — the sky. Set your camera to spot metering to ensure proper exposure for the moon.
- Bracketing: Experiment and take photographs with bracketing on. This will give you an opportunity to view your composition at various exposure levels and its effects.
- Full Zoom: As the subject is too far away from us, thereby use full zoom to compensate for the distance. You can consider using telephoto lenses as well.
- Turn The Flash Off: The subject is at such a huge distance that flash hardly makes a difference but it can produce reflections of interfering objects and thus distort the composition. Therefore, the rule of thumb says to turn the flash off.
- Shoot in RAW: Shooting in RAW is recommended as it is advantageous to later re-touch your captures and enliven them to your expectations.
-
Equipment And Accessories:
At wide aperture settings, comes along the slow shutter speeds. And to compensate for slow shutter speeds and avoid blur in your photograph, consider using a tripod. If you can’t then you may want to place the camera on a stable surface. Also, it is advisable to use a telephoto lenses which will allow you to zoom in and fill the frame with the moon. The subject is at such a distance, that you need to magnify it to its possible range to get appropriate size and details.
-
Cautions:
- Avoid high ISO to keep noise to a minimum or overexposing the moon.
- Avoid camera shake to keep the blur at bay
- Be well prepared. As moon is quick to walk across the sky amongst the clouds and change halos.
- Take Multiple Shots and consider shooting in RAW. This will cover up for any errors and allow you greater flexibility while post-processing.
- Have spare battery handy. When you are shooting at night, you’ll be using the cameras back/lights to illuminate the display/LCD. Also the long exposure will consume battery easily.
Quick Tip: Shooting in the dusk when the sky still has it’s tone of blue though a dark shade will ensure better exposure and some surreal colors — an orange moon against the dark blue sky.
Do take out time and share your shots of the moon with us.


Use Registax .
You can align multiple shots and use a “Darkframe” increase the quality of your Photos.