
The marine life underneath the waters is full of surprises. Wonderful colors, unusual shapes and challenging conditions make it all the more interesting to try underwater photography. Underwater photography in its true essence offers the possibility of many exciting and rare photographic opportunities. Apart from photographing the flora and fauna underneath waters, photographers also pursue shipwrecks, submerged cave systems, underwater “landscapes” and portraits of fellow divers. If you also like to reveal the hidden secrets of nature, here are 10 quick tips to get you started with underwater photography.
-
Get Comfortable Underwater
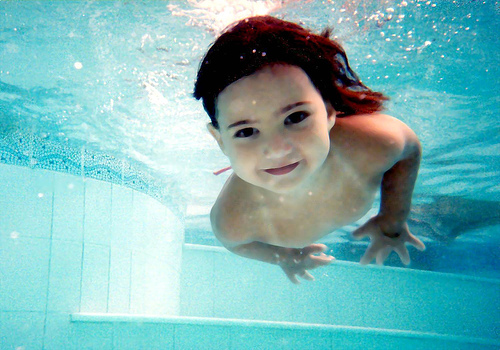
Let’s get started with clearing off the stumbling block of underwater photography — the diving techniques. You have to prepare yourself for photographing under-waters perhaps by learning some basic scuba diving or snorkeling lessons. The underwater photography schools do pretty well in imparting the required diving skills (for instance Cathy Church’s underwater photo classes). Photographing in waters require appropriate skills for balancing, floating and following the marine life. Second comes the handling of the equipment through the knobs provided on the housing cases. Unlike photographing on land, shooting under waters requires you to compose the shots with your body floating in the water. Be it snorkeling or scuba diving both require you to first learn to control your movements (and equipment) and then look for the possibilities to shoot. Once you are all set, you can take amazing photographs of aqua-marine life at the surface while snorkeling or in deep seas with the help of scuba diving. The most important thing is to handle the equipment; which can be mastered by making the swimming pool your testing ground.
-
Understand The Marine Life
Establishing the relationship with your subject is the primary requirement of taking amazing photographs. This fact holds true for underwater photography as well. Getting to know the behavior of underwater creatures is the essence of underwater photography. Some facts like how close you can get to the school of fishes, the depth at which you will find the coral reefs, reactions of underwater life to danger form the basis of code of conduct for underwater photography.
-
Get Closer To The Subject
The primary obstacle faced by underwater photographers is the extreme loss of color and contrast when submerged in deep waters. While photographing on the surface (or upto 20 ft deep) gives you an opportunity to use natural light, its availability drastically reduces as you go deeper. The underwater world appears colorless even to the naked eye at deep levels. Thus to photograph the subject you have to get closer to the subject; not by zooming in with your camera but by manually moving closer to the subject. The distance between you and the subject should not be more than 1-3ft. Getting closer to the subject helps you in capturing the true colors, patterns and the aesthetics of marine life. Especially focusing on the eyes (of creatures) and fine details (of underwater flora) help you get stunning imagery.
-
Shoot At Eye Level
Shooting the marine life from above makes them appear small. Get closer and shoot at eye level to make them look more prominent in the photos. Compose the shots while looking at the LCD screen and try to photograph them from below as well. This helps you in clearly defining the edges and curves, which renders the ultimate beauty to the shots. Capturing the silhouettes or the shots of the underwater creatures locking eyes with you also form interesting photographs.
-
Use Flash As Secondary Source Of Light
As mentioned earlier shooting near the surface enables you to take advantage of natural light whilst shooting in deeper levels. When shooting in deep waters it becomes mandatory to turn on the flash. The flash light acts as the primary source of visibility in deep waters.
Even when using the flash as the primary source of light, make sure that the subject is not directly illuminated by flash as this may result in back-scattering. You can however avoid back-scattering by using external flash. Position the external flash away from the lens to avoid back-scatter.
Flash is prominently required in underwater photography to bring out the wonderful colors and to freeze the movement. However using the flash as primary source of light helps you in focusing on the subject while the background is eliminated off the scene taking away the sense of the place. Thus use the flash as the complimenting source of light or a much better workaround is to use two external flashes.
-
Take Care Of White Balance Settings
White balance settings play a prominent role in enhancing the colors in underwater photography. We have discussed this earlier as well that underwater photography suffers from extreme loss of color. This is so because the longer wavelengths of sunlight (such as red or orange) are absorbed quickly by the surrounding water, so everything appears blue-green in color even to the naked eye. The white balance settings thus help in restoring the accurate colors by avoiding the color casts. It is advisable to either leave the white balance to auto or sunny while avoiding cloudy all the time. This is not the only secret behind the vivid colors you get in underwater shots. You will also need to set the saturation levels in-camera (or under-expose by .07 EV) to pep up the colors. However the best work-around for so many in-camera settings is to shoot in RAW, enjoy the shoot and fine tune the color information in post-processing phase.
-
Think About Ideal Color Combination
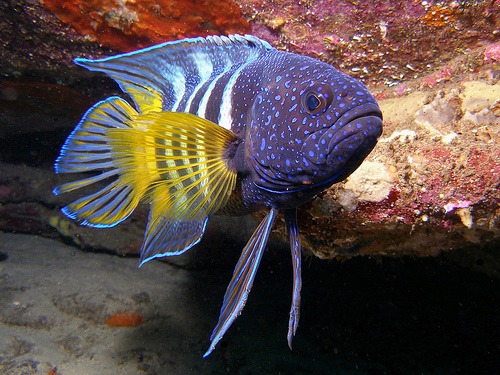
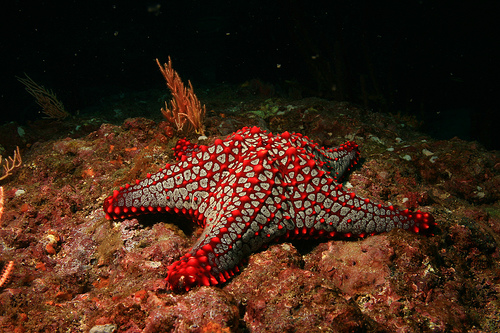
Underwater photography provides you an opportunity to explore the unseen yet wonderful colors of nature. The submerged life has secret surprises in store for you. Get into the waters to experience the unusual world altogether. Closely observe the marine life. In the under water world dominated by blue-green, you will get to experience the vivid and contrasty colors which can contribute to the aesthetics of the image. Compose the shots with the contrasting colors in the scene to exaggerate the colorful marine life (as in the example below).
-
Take Macro Shots
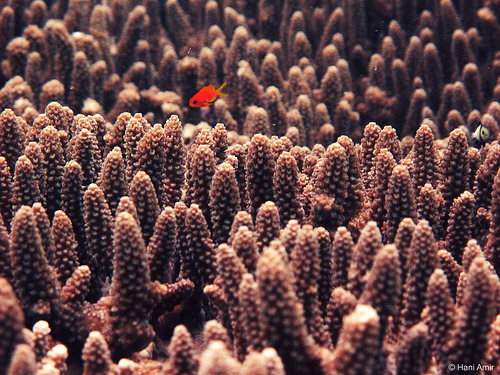
While most of the time you wander in waters to capture the beauty of entire scene in form of school of fishes, underwater creatures against the reef in the background or covering the coral reef in its entirety, it is a good idea to experiment with macro shots. Get ready to get much more closer to the marine life and capture the fine details in form of fragile textures and amazing patterns by using the macro lens. Some underwater housings allow for the use of wet-coupled lenses. These wet-coupled lenses may be added or removed underwater, allowing for both macro and wide angle photography on the same dive.
-
Fill The Frame
While macro lenses enables you to photograph the fine details, using the wide-angle lenses on the other hand offers you the ease of photographing the big picture — the underwater arena or the underwater real estate. The wide angle lenses come in handy for filling the frame with beautiful scenery; allowing you to capture contextual imagery of marine life.
-
Process The Images To Regain Contrast And Sharpness
It is always better to tune the camera at the time of shooting itself. It saves a lot of time, effort and help you in controlling exposure as required by the scene. But when shooting under waters setting the camera for each shot becomes much of a task. If you can manage to tune in-camera settings nothing like that. If you are there to enjoy the dive and the shoot it is better to shoot in RAW. Make the necessary adjustments like correcting the color cast, resurrecting the contrast, fine-tuning the sharpness and enhancing the colors in RAW editor.
This is just a teaser for underwater photography aspirants to get started with exploring the opportunities in the unseen, unusual world. Underwater photography has a technical side to it as well — choosing the right gear, camera settings and getting hands on experience in diving being the major contributors. Check out the stunning underwater shots and watch this space for more on underwater photography.


Awesome guide to underwater photography. I included this link on my page about underwater photography – http://www.squidoo.com/underwater-photography-guide
And yes, macro shots are awesome when you take photos under water. Especially when you have a nice terrain full of colours in front of you :) Sea is awesome for underwater photography!