
Black and white photography is classic. And toning and tinting the black and white images; sometimes for archival and other times for creative effects has been there right from traditional times. Just like Sepia, duotone has also gained a firm ground for itself among the classic photographers. But that’s not it. The twist to the story is that these effects add drama and new story to the images.
This is what I realized when took up to split toning for the first time. And after trying duotone, I was again amazed by the results. So I thought to share bits of knowledge and how to about Duotone here.
Duotone is quite similar to black and white. It is a picture in two tones or colors. Thus, it has two distinct tones other than the usual blacks and whites. It can have blue and black, blue and orange, and so on. Earlier blue, yellow, brown and red were used in duotones.
However this effect cannot be achieved in-camera. It needs some darkroom techniques to accomplish the task. Duotone images are yielded by adding one or two colors to the black and white images. So we will have to start with converting colored image to black & white. You can try one of these techniques to convert your images to black & white and then you can go about toning the images to achieve the duotone effect. So, without wasting much time, let’s get to steps for creating beautiful duotone images in Photoshop.
How To: Converting An Image To Duotone In Adobe Photoshop
Here is the step by step guide to create duotone images in Photoshop:
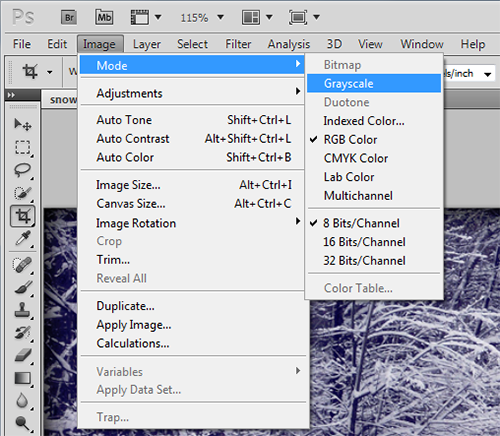
- Open the image in Photoshop and go to Image > Mode > Grayscale. Make sure 8-bit/Channel is checked.
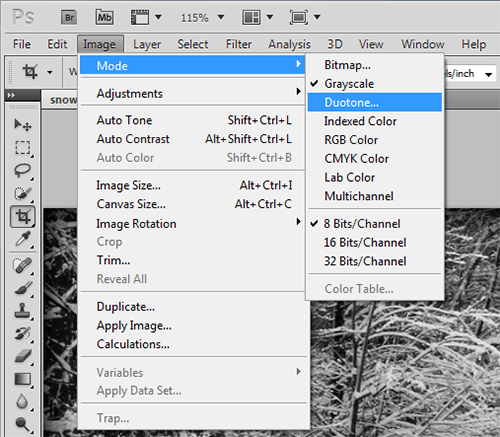
- Go to Image > Mode > Duotone.
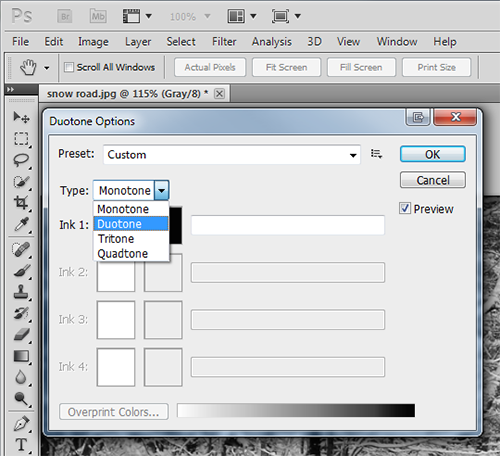
- This will open up Duotone Options dialog box, where you will be making the choice of tones to transform your image. So make sure you select Preview to view the changes with each selection of tones.
- In the Duotone Options window, select Duotone from the Type drop-down (as shown below).
- By default, the first color may be black. You can change it to whatever you like; you can go in for one of the primaries R, G, B or any custom color. Click on the black box and pick the color from the ink color dialog.
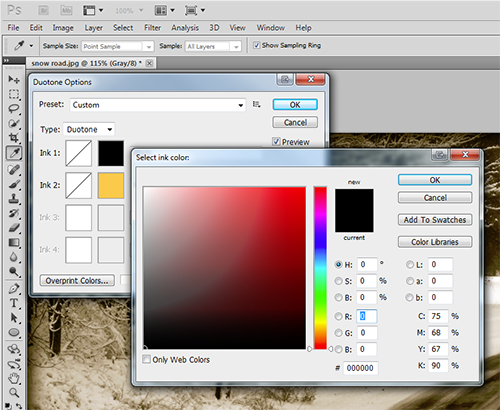
- Next, you need to choose the second tone. Click on the colored box next to Ink 2 to select the colors from Color Libraries. Select an ink from Book dropdown.
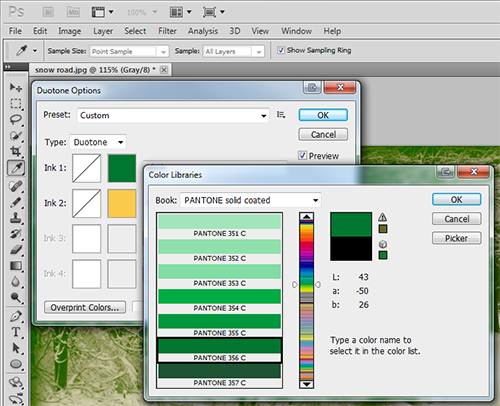 [Note: To create highly saturated colors, select darkest inks at the top and lightest at the bottom].
 - Once you are satisfied with the tones, click on the Curve box located to the left of the colorbox in the Duotone options window itself. Adjust the duotone curve for each ink color to alter the way color is distributed in highlight and shadows. Set overprint colors, if required.
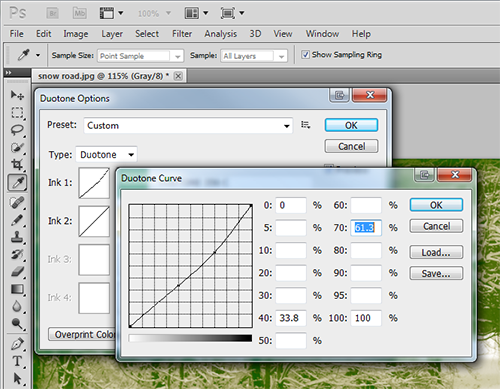
- Click OK to see the final image — a beautiful duotone image.
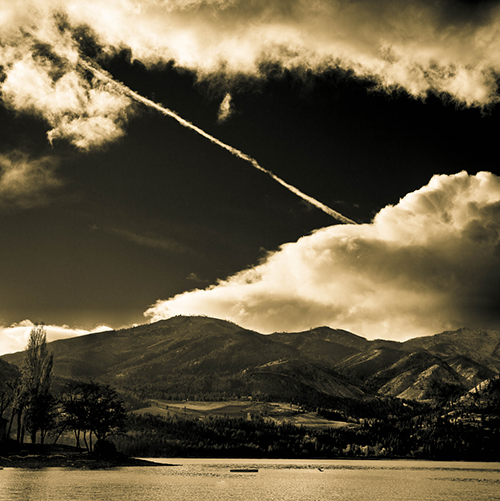
Here is the before and after effect of duotoning.
Before: This is a grayscale image you can start with.
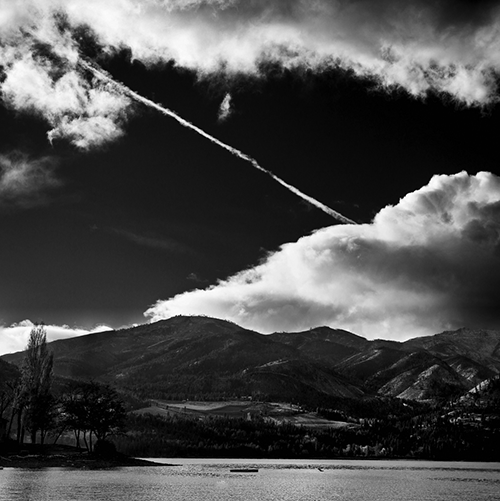
After: This is the final effect that is achieved through duotone.
How about trying it out? Choose one of your images, fire up Photoshop and delve yourself into this unusual style of coloring the images in two tones.

