
 Burning and dodging are terms used in the process of finishing digital images in Photoshop and similar image processing software.
In the context of film and print processing, where the terms originated, dodging means withholding light from an over-exposed part of an image projected onto on photo paper under an enlarger, and burning means just the opposite, i.e., to add more light to under-exposed areas. Thus, dodging makes part of an image lighter, while burning makes selected areas darker.
It is necessary to mention at the very outset that burning and dodging must not be used indiscriminately. They must be applied judiciously in a subtle manner so as to give little clue to the viewer that such processing has taken place.
For photographers who are at the stage where they see an image in their mind’s eye and then proceed to create it, these two tools invariably find a lot of usage.
That is because the reality of how an image is lit or positioned is usually far from the photographer’s concept of what the finished image should look like. This is where burning and dodging comes into play — to manipulate an image to make it conform to our inner vision.
Perhaps it would be better to demonstrate the before and after stages of a few pictures I shot to illustrate the point.
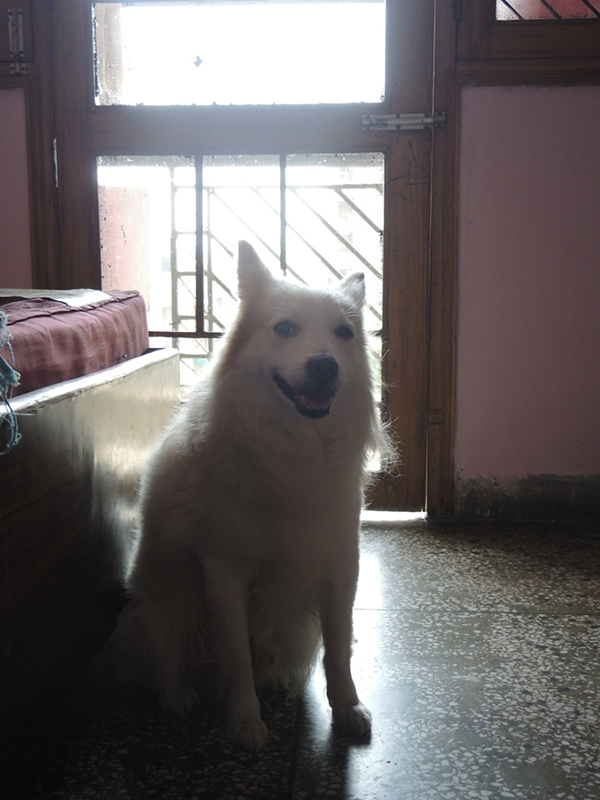
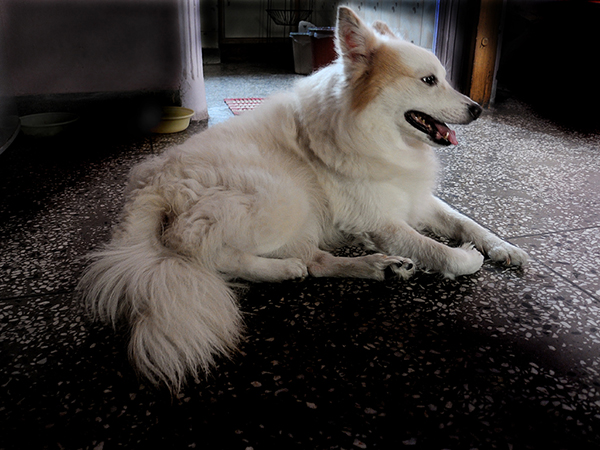
Let’s start with the first example shot.

This being an indoor shot taken in available light, is quite flat and lacking in contrast.
Moreover, the background is so cluttered and obtrusively bright that it distracts the viewer’s attention.
There is no emotion in the shot, no drama. But there is a potential to add finishing touches to the image to thus make an impression. With right tools and techniques at hand, it doesn’t take much time or effort to transform a flat, boring snapshot into an image worthy of enlargement.
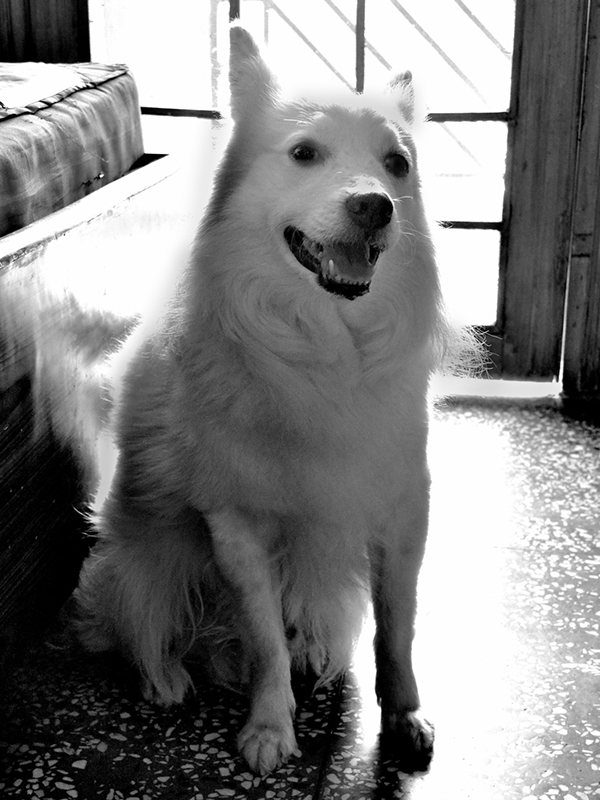
For instance, in this example shot, the cluttered background was burned in gently and in progressive stages. Only some deep, near-impenetrable shadows remain. They may leave viewers guessing but will not distract the viewer’s attention.
As far as the range of the effect is concerned, it is better to tackle the highlights first, followed by mid-tones and finally the shadows. These options are available in Photoshop’s dodge and burn tool specific menu at the top.
Quick Tip: Use low levels of exposure (say, 3% to start off with) when burning or dodging so as to build up an effect gradually over several passes with the burning or dodging tools.
I would also like to mention that I intentionally chose (and shot) for this lesson a white object, so as to present a difficult lighting situation and demonstrate how to tackle it. Natural light streamed in from the left through an open window, colored by its passage through a multi-hued awning. Thus, burning can also be used to burn away irrelevant colored specks that detract from the final result.
Flash was not used; unless it is bounced off a white ceiling or wall, it usually leads to ‘green eye’ in dogs — an unpleasant effect hard to remedy, even in Photoshop. A white sheet draped over a clothed horse added some fill light from the right. Since household pets don’t stay at one place for very long, the entire sequence of B&W and color images was shot in a matter of minutes, using an inexpensive compact camera. A little tweaking of brightness and contrast in Photoshop and the image was ready!
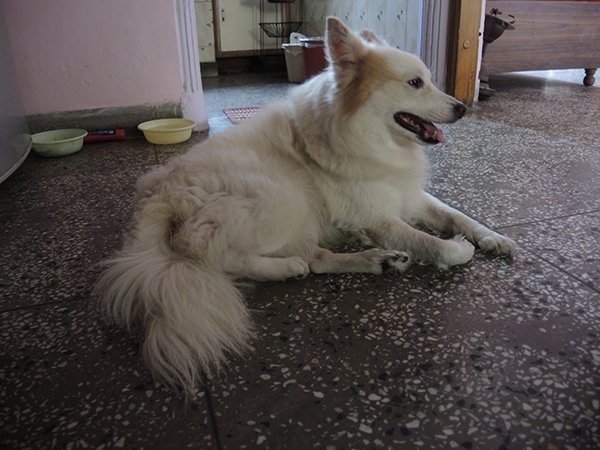
Just to drive the lesson home, I took an extreme shot against the glare of an afternoon sun. The range of tones far exceeded the ability of the digital camera’s sensor to cope with this color shot. Check out the test shot below:
There was quite a bit of chroma noise in the shadows, so dodging was futile at this point. Moreover, the highlights on the fur were clipped… gone forever. What could I do?
Photoshop to the rescue! To bypass the chroma noise problem, I first desaturated the image to convert it into a black and white one.
The next step was to crop the image, to add modelling to the picture. This was followed by judicious dodging of the front portion of the subject to open up the shadows. Special attention was paid to adding catchlights (check out the tips for photographing the catchlights here) to the eyes by careful spot dodging. I also did some slight burning in of the highlights on the crown of the dog’s head, then a little use of the brightness and contrast sliders.
This is the end result and I must confess I’m rather pleased with it: so pleased, in fact, that I’ve printed it 10” x 14”, and it looks good at that magnification.
There is no substitute for practice. So utilize every opportunity to sharpen your dodging and burning skills. I can’t resist adding one more example of a contre-jour (back-lit) shot to demonstrate the effects possible with these indispensable and versatile tools…
The original shot first…
The original jpeg is nice, but it is dull and there are too many sundry details to let the eye settle on the subject.
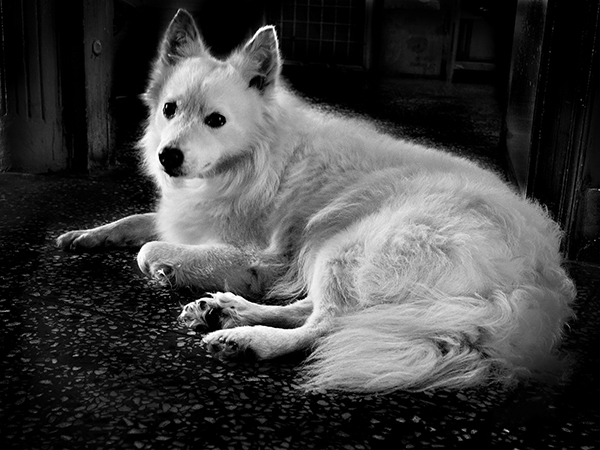
The solution was to burn in the shadows by creating a path of light, keeping in mind that light travels in a straight line (but can bounce off reflecting surfaces).
By using the know-how given above, I was able to suppress the visual clutter, dodging and burning wherever needed to completely transform the mood of the picture. Here is the end result, with the 3-D effect being a bonus.
Good luck with your dodging and burning!

Excellent post
Excellent examples of before and after and great explaination of the dodging/burning process. Thank You.