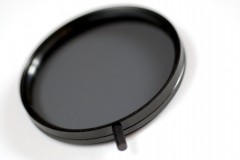
Camera filters are cheap yet excellent accessories which directly affect the camera results. Optics play a critical and pivotal role in photography. Camera filters are special glasses which can be attached to the camera lens to achieve various optical effects. Just like you wear sunglasses to protect your eyes, filters can be used to protect the camera lens, to adjust the brightness of the scene or for inducing special effects. They help you achieve different results depending on common requirements of photographers and what the scene(s) call for. Filters come in different sizes and you should check the size of the circumference of the camera-lens’s front element. A typical lens most of the time has it mentioned in mm (millimeters) on the rim of the lens. Here’s a list of 5 must have filters for your photographic kit.
-
Ultra Violet Filters
UV filters also known as skylight filters or protectors are a must for any photographer. The primary use of this filter is to protect camera lens against scratches, fingerprints and other damages. Ultra violet rays tend to cast a hazy effect in the final results. Using a UV filter this can be avoided to a large extent. A skylight filter should be left on at your lens at all times to avoid damages. Hoya is one of the most popular brands for filters. Hoya UV filters come in 52mm, 55mm, 58mm, 62mm, 67mm, 72mm, 77mm, 82mm.
-
Polarizing Filter
Polarizers are used to reduce the glares from reflective surfaces. They thus enhance the color, saturation and contrast of the scene. They are commonly used for capturing plants, foliage, water or shiny objects. Polarizers tend to offset the exposure by about one stop (1EV) and thus are not recommended for low light scenes and portraits. Polarisers have to be adjusted by rotating the filter till you achieve the desired effect. You can easily find polarizing filters in 52mm, 55mm, 58mm, 62mm, 67mm, 72mm, 77mm, 82mm at Adorama.
-
Graduated Neutral Density Filter
While shooting sunsets or landscapes the picture usually appear underexposed or overexposed killing entire beauty of the scene. This happens because the dynamic range (the brightness levels) of the scene is too high for the camera to capture the scene with proper exposure in all parts. This is where GND (Graduated Neutral Density) filters comes in handy. The GND filter has a gradient of a dark shade at the top to total transparency at the bottom. This helps tone down the sun or any source of light thereby bringing down the dynamic range of the scene. See some examples of GND filter effect here. Pick up a GND filters of the required size: 49mm, 52mm, 55mm, 58mm, 62mm, 72mm, 77mm.
-
Neutral Density Filter
Neutral Density filters find application in extremely bright scenes. Extremely bright scenes cause the camera to meter and expose at a very small aperture, a high shutter speed and low ISO. For example shooting the mid-day sun; it is impossible to capture it with the camera since the camera technically doesn’t even support the fast shutter-speed required to make the proper exposure. ND filters darken the entire scene to the normal brightness levels so that the camera can capture them. If you like to shoot into the sun or reflections etc, you need a ND filter. ND filters allow you to capture the subject without compromising the camera settings (exposure, aperture etc). These are the most basic and widely used filters which are available in 49mm, 52mm, 55mm, 58mm, 62mm, 67mm, 72mm, 77mm.
-
Soft Focus Filter
The soft focus filter is a special effects filter. It eliminates the sharpness or blemishes in the skin of the subject and brings in a beautiful hazy and dreamy effect to your portraits. This works well for all portraits be it kids, females or seniors. If you want to capture the facial texture and characteristics then you may want to avoid this filter. These filters are commonly available in55mm, 62mm, 67mm, 72mm, 77mm.
The good thing about filters is that they don’t cost a fortune and they give you some awesome effects and help you tune light as per your requirements. And as you recall, you can do anything to a photograph during post-processing but light remains a feature that can’t be altered once captured. Thus it’s wise to correct the lighting during the capture phase itself. Welcome to the world of filters. Remember to go for a well known brand with good quality optics else it will do more harm then good by delivering you poor light characteristics. Which ones do you commonly use?


Hi,
I totally appreciate this information adn I am very new to DSLR and am just learning. I understand the filters now but how to choose which length is the best? Say could you use 58mm CPLon either of (1) 50mm f/1.8 or (2) 50-250mm Telephoto zoom lens on Canon 550D .
Thanks again,
Sesha.
@Sesha: That would depend on the lens’s rim. Please check your lens specifications for details.