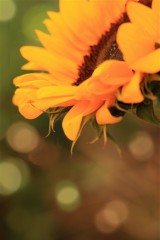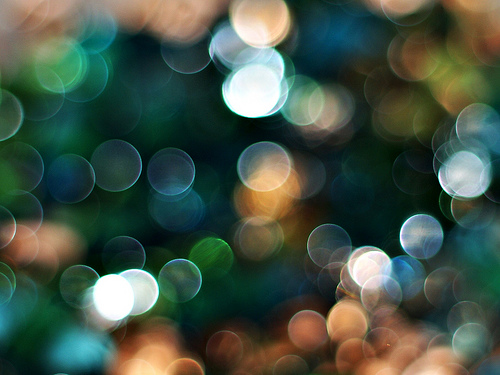
Bokeh is the photographing technique of aesthetically blurring the background; to exaggerate the effect of the lights shinning in the background/foreground. The word bokeh comes from the Japanese word “boke” (pronounced bo-keh) which literally means fuzziness or dizziness. The bokeh effect transforms the overall look and feel of a fairly simple view to the one categorized as “awesome”. The bokeh effect does wonders by adding a surreal perspective to your captures (check out the examples here). It adds the third dimension of depth missing from the two dimensional images. It not only helps in eliminating the cluttered background; but also helps in presenting the background beautifully and elegantly. The effect compliments the images with airy effect; thus inducing the dreamy effects to wedding photographs, thematic support for objects and beautiful imagery of scattered lights in the background of focused subjects.
The simple way to create a beautiful bokeh effect is to deliberately blur the background to result in a qualitative representation of out-of-focus area. Check out our article on blurring the background for some tips on how to effectively blur the background. The same basic principles come in handy to create “the bokeh effect”.
-
Glowing Background Is The Essence Of Bokeh
The bokeh effect is nothing more than the presentation of scattered lights (or any vibrant pattern for that matter) visualized by the lens of your camera. The background should be brighter or comparable to the subject itself. However, you will not be able to get the desired effect in low-lit background.
-
Equipment & Accessories
The bokeh effect or the blurring effect is not easily attained by the the normal point and shoot cameras or the handy compact cameras. The effect is generated with a narrow depth of field and high zoom factor. It is therefore worthwhile to consider the following equipments and accessories for a justifiable bokeh effect.
- Prefer using a Digital SLR over the regular point and shoot cameras.
- Zoom lenses with high zoom factor; to effectively focus the subject and to deliberately blur the out-of-focus subject (the glowing background).
- Consider using a tripod; to compensate for slow shutter speeds.
-
Camera Settings
The bokeh effect is obtained by aesthetically blurring the background; with an aim of producing the circular discs of the available background lights. For the said effect you need to strive for a narrow DOF (depth-of-field). Tune your camera to following settings for creating beautiful bokehs.
- Aperture-Priority Mode: The simple way to attain a narrow DOF is to set your camera to “Aperture Priority” mode. The camera takes care of rest of the settings; enabling you to focus on a very narrow plane in the entire scene thus, withdrawing the focus off the background (making it surreal).
- Manual Mode: If you want to aimlessly capture the light source to create a bokeh effect; you can set your camera to manual mode. Set the aperture to the lowest f-numbers (to attain a wide aperture), slow down the shutter-speed and manually set the focus (the auto focus can be tricky when there is no subject to focus).
- Full Zoom: Ensure that you have zoomed in your camera lens to the full zoom. The high zoom factor provides maximum focus on the subject thereby eliminating the background details (and thus presenting the scattered background lights in an elegant manner).
-
Lens’ Focal Length
One of the four things that you need to create the soft dreamy bokeh effect is the focal length of your lens. The rule says, given that all other settings remain constant, a higher focal length achieves shallower DOF. Thus at times varying the focal length alone can assist you in obtaining the blurred effect. It brings along with it a very high chances of creating beautiful bokehs when the background is lit by glowing lights.
-
Bokeh Is Inversely Proportionate To Subject’s Distance
Try to minimize the difference between the camera and the subject to attain a shallower DOF. The closer the subject; more the chances of blurring the background; thus, more of out-of-focus effects.
-
Create Bokehs Off Camera (Post-Processing)
In addition to in-camera settings, you can create beautiful bokehs off-camera as well. Various image editors like Adobe Photoshop and Pixelometer and Android apps like After Focus provides the flexibility of blurring the background details to induce the bokeh effect. There are several approaches to this some requiring complex masking etc. Ensure that the final result looks natural and not spiced up which is a big turn-off for other professional photographers.
Remember, bokeh is an element of beauty and when effectively used it adds depth to the photograph, draws the viewers’ eyes to the subject and complements the subject.


I once make a Bokeh by taking a picture through a window with dew drops on it. It’s only 2 colored but it looks like what other Bokehs would look like.